Last month I blogged about how our Admin Assistant product automatically creates Office 365 Signature blocks using company information stored in either Active Directory or in Office 365. This post shows how end-users can get the same signature from Office 365 into their Outlook 2013 in two steps. There are several ways to copy an Office 365 online e-mail signature block to an Outlook client, unfortunately neither Office 365 Tools nor the Outlook client tools that provide an out-of-the box option to synchronize the signatures. The good news is that performing this task is extremely simple and can be accomplished by virtually anyone. Many companies will update the employee’s online signature block several times each year to reflect product or company strategies or promotions. In these cases an administrator can use Cayosoft Admin Assistant to construct the new signature and then give those employees using Outlook 2013 client the following simple instructions to copy the new signature block to their Outlook client.
How to Copy the Office 365 Signature to Outlook Client
![]()
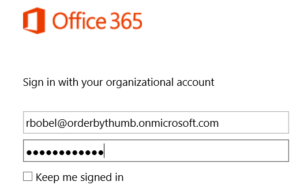
Step 1: Copy the Office 365 Signature from Office 365
- Open a web browser and go to http://www.outlook.office365.com/

- Enter your Office 365 username and password then click Sign-in.
- Create a new mail message by clicking New Mail.
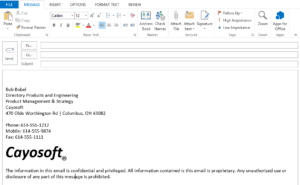
The new mail option is at the top left corner of the Outlook web page. After you click this option a new e-mail message will appear. In the body of the new message you will see the default signature block.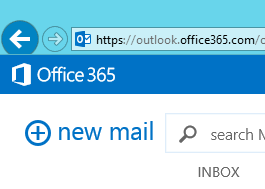
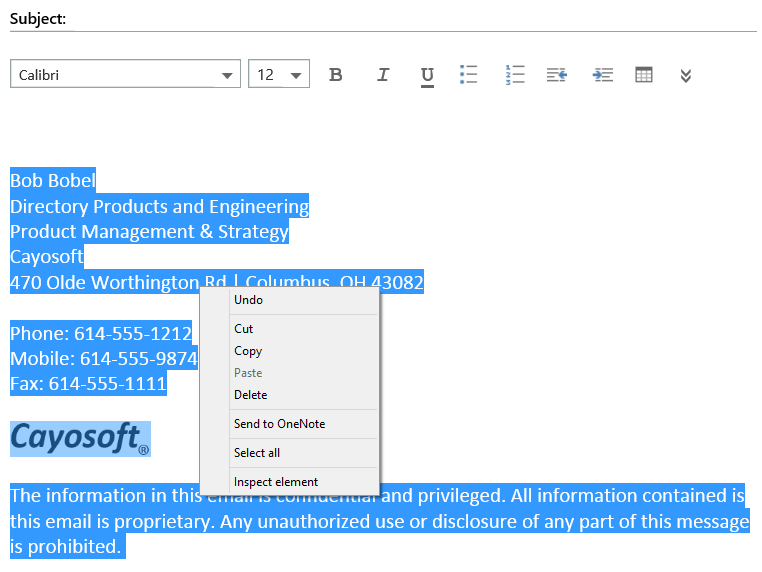
- Select the signature block that is displayed in the new mail message.
- After selecting the signature block right-click and choose Copy.
You can also copy the signature block using CTRL+C instead of the right-click method.
Step 2: Paste the Signature block into the Outlook 2013 client
- Open the Outlook 2013 client.
- Click New Mail at the top right.
A new e-mail message will appear.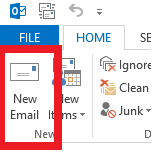
- On the new e-mail message toolbar click the option arrow below the Signature icon then click Signatures.
The signature dialog box will appear.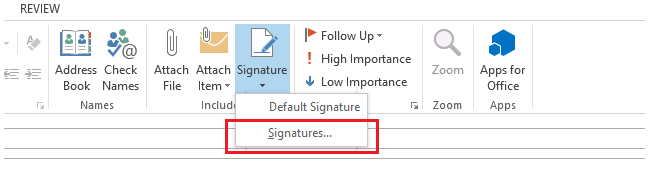
- In the Signature and Stationary dialog box click Default Signature.
If there is already a signature displayed in the Edit signature area you may need to remove it before going to the next step. Optionally you can create a new signature and then set it to be the default for new messages. - Right click in the Edit Signature area and choose the Keep Source Formatting (shown here boxed in red).
The signature block copied from Office 365 should appear in the Edit Signature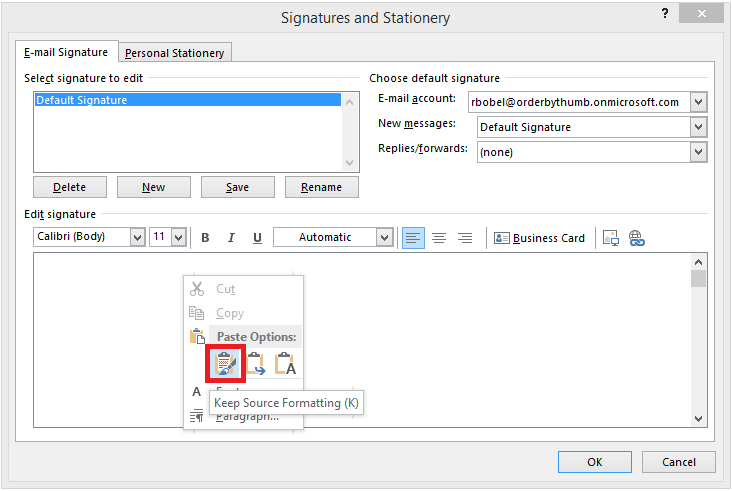
- Click the Save button to save this new signature as the default signature.
- Click OK to close the Signatures and Stationary dialog box.
- Close the blank e-mail without sending it.
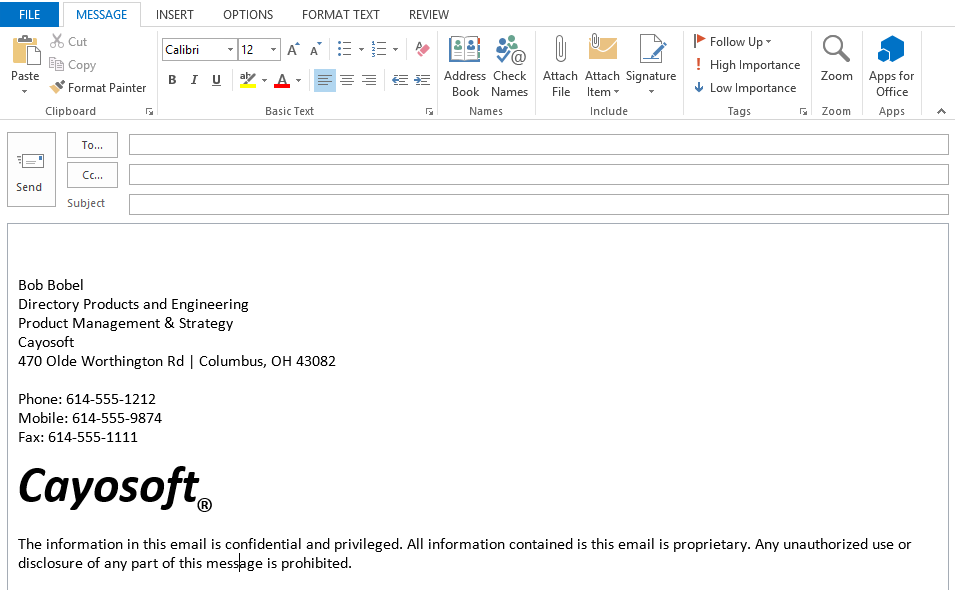
- Test your signature by creating another new e-mail message. Your new signature should now be displayed.
Cayosoft Administrator delivers the missing management layer needed to simplify Active Directory & Office 365 Administration and other day-to-day tasks on a variety of on-premises and cloud applications found in today’s modern hybrid environment. Form more information on generating automatically generating Office 365 Signature Blocks using the company information stored in Active Directory or Office 365 visit the Admin Assistant for Office 365 product page.